This is a third instalment in a miniseries about our experience building TodoMVC application using React Native. First two posts are here and here.
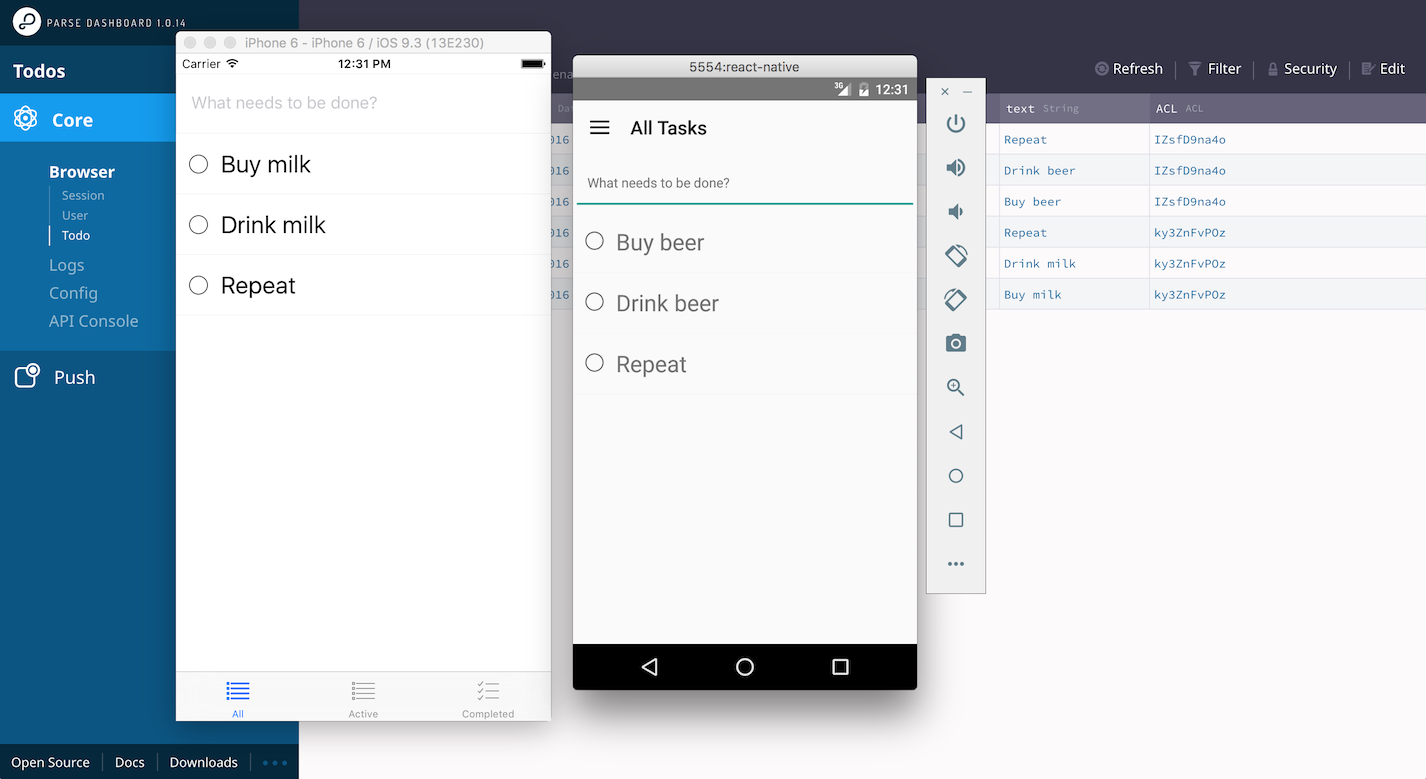
In this post we will be setting up continuous integration process for TodoMVC application using Fastlane, Bitrise and Testflight.
Battle plan
Let’s start by figuring out what a good CI scenario could look like in our case:
- updated application code is pushed to master branch on Github
- CI server gets the latest code
- it builds the iOS binary and pushes it on TestFlight
- updated project artifacts are committed to master and pushed back to Github in order to make sure that the build number is in-sync
Note: There is one important piece that is currently missing from this flow - testing your application. We currently do not have any test suites set up for TodoMVC so we will have to skip the testing part for now. If you are repurposing this CI workflow for your own app, you can easily add testing part later.
Based on the scenario outlined above there a few things we are going to need:
- access to a Machine user Github account that will be responsible for accessing Github repositories during deployment process - we are using a friendly robobaker for this purpose
- valid Apple ID with access to Developer Portal and iTunes Connect
- Bitrise account
Setting up Github Machine User
As you will see in the sections below, our CI server will need to access 2 different repositories (application codebase and certificates + provisioning profiles) both of them hosted on Github in our case. You can refer to this guide outlining various options of managing deploy keys. We’ve decided to use the Machine User approach since it is very explicit and powerful and allows us to minimize the number of keys we need to keep track for various deployments. Please refer to the guide for details on how to set up a machine user account. Make sure to add your machine user as a collaborator on the application code repository.
Note: If you are just experimenting with this CI setup, you can use your personal GH account as a machine user and skip this step.
Setting up Bundle and App IDs
We will start by creating and registering a new iOS application:
- head to Developer Portal
- select App IDs menu in the Identifiers Side Panel and click on + sign on the right to create new bundle ID
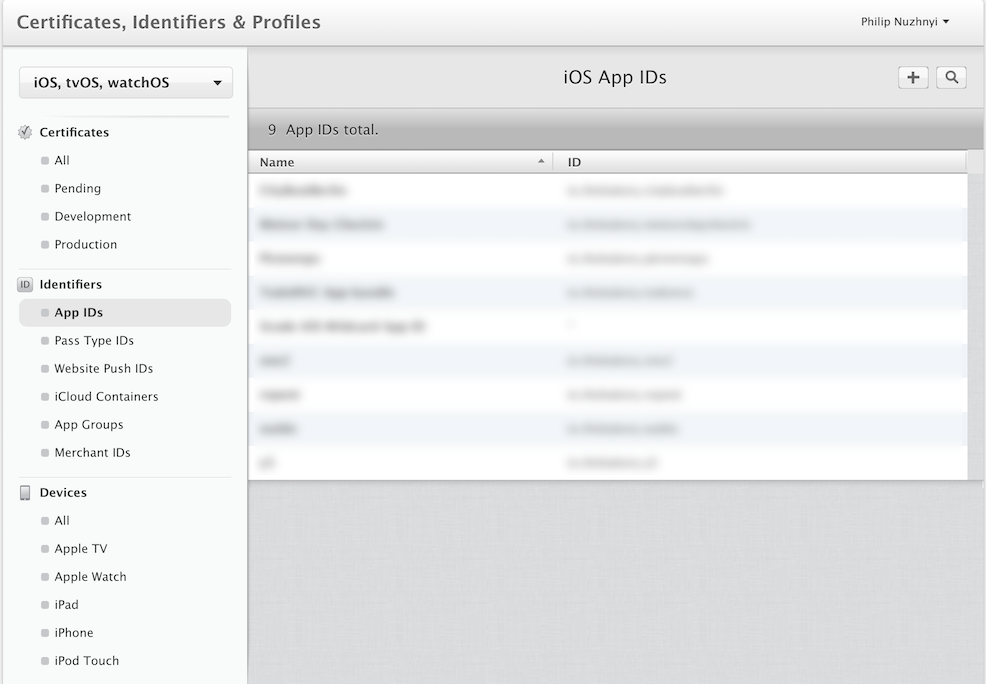
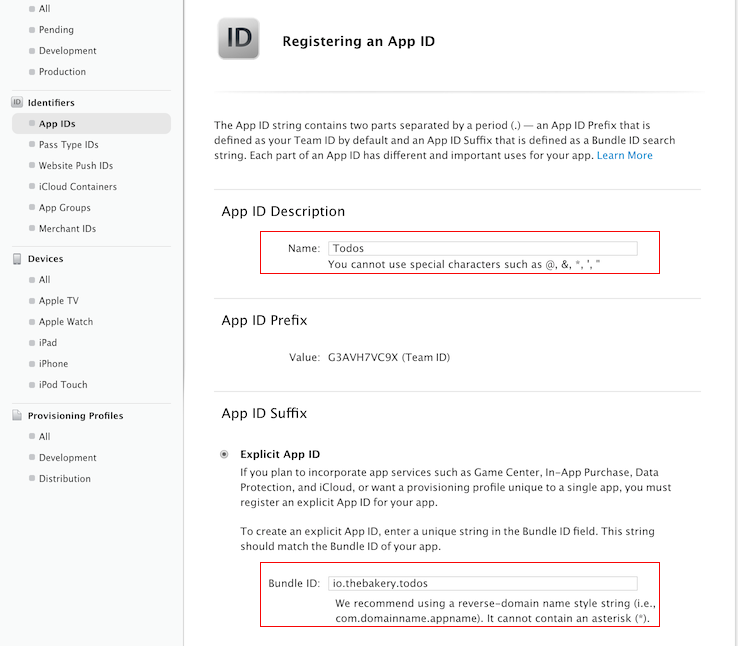
- fill out App ID Description and App ID Suffix details
- now head to iTunes Connect Portal where we are going to create a new app
- navigate to “My Apps” section and use + sign in the top left corner to create a new app
- fill out New App form using bundle id you’ve entered when created app id in developer portal
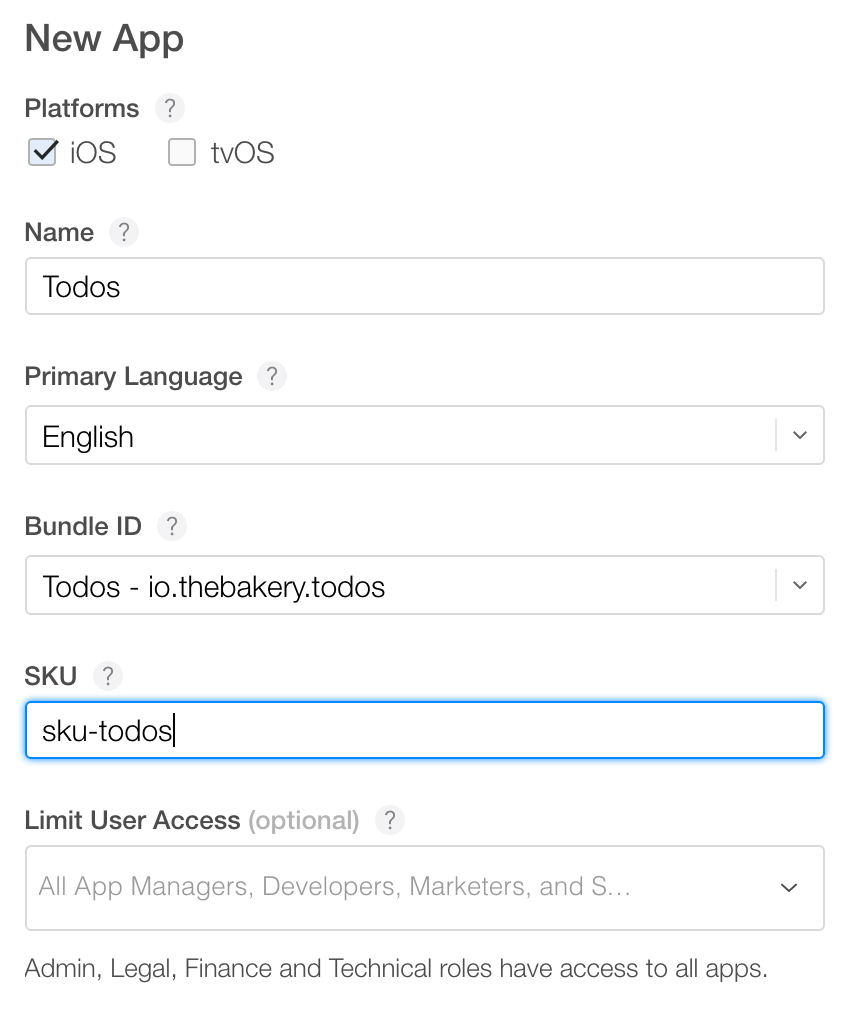
Recap: Before moving on to the next step, make sure you’ve successfully completed all the previous steps with app registration and have all the following pieces of information handy:
- email address you’ve used to login to iTunesConnect and Developer Portal
- application ID (in our case it’s io.thebakery.todos)
Setting up certificates repository
We will also need a private repository for storing certificates (more on this below). I’ve created a private repository on my github for this. Make sure to add your machine user as a collaborator on the certificates repository.
Automated build numbers
In order to take advantage of automated version and build numbers using agvtool for the iOS project, please follow steps described in this technical guide - it boils down to adjusting a few parameters in the build settings.
Fastlane
Fastlane is a collection of tools that help you automate building and releasing iOS and Android apps. If you have not used Fastlane before, you should definitely check it out - it is gonna make you happy and productive.
Setting up fastlane
Note: You will need Ruby and Bundler installed on your machine to proceed with Fastlane
There are a few tools from the fastlane collection that we will need to install. app/fastlane/Gemfile lists all of them for you. You can head to app/fastlane and run bundle install to install them.
Match
Fastlane Match is responsible for syncing certificates and profiles across teams and servers.
You will need to update the Matchifile in app/fastlane with your specific account information
Important! Please make sure that your repository url has the following format git+ssh://git@github.com/callmephilip/todos-certs.git
In order to generate certificates and provisioning profiles, you will need to run match appstore and match development for App Store and your local phone respectively (development certificate is optional for the purpose of this tutorial but it’s still good to know).
During this process you will be asked to create a passphrase (password) for the repository (this is not your Github password!), please take note of this since we will need it for further steps. If all goes well, you should see certs and profiles in your private repository
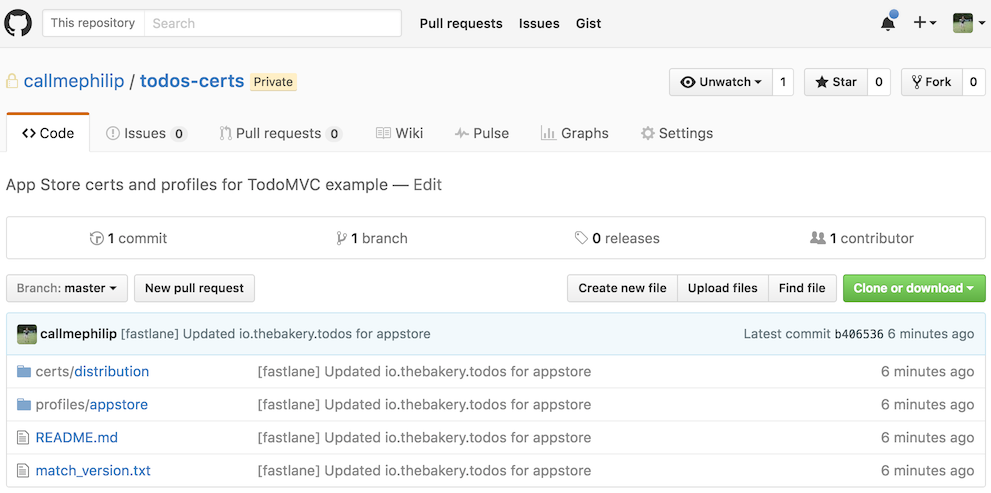
Recap:
- updated Matchfile with your account information
match appstoreran successfully and your repository has certs and profiles- passphrase you have used to encrypt certificates and profiles
Fastfile
Let’s take a look at Fastfile located in app/fastlane
With this configuration in place, we can push app builds on a “beta” lane which will make them available on your TestFlight. Before we can try this though, there’s one last thing left to do.
Configure code signing in Xcode
It is important to configure this stuff correctly so Fastlane can do all the heavy lifting for us. You will need your app Bundle Id for this (io.thebakery.todos in our case). Open your iOS project file in Xcode and head to General Tab - we are interested in the Identity subsection - fill out bundle identifier field with your app’s bundle id.
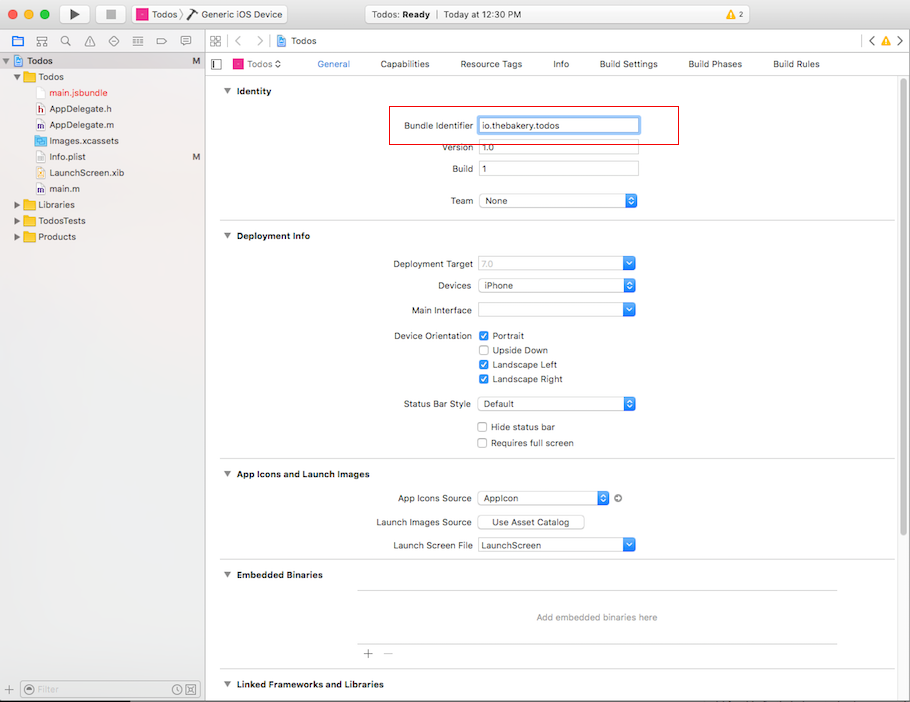
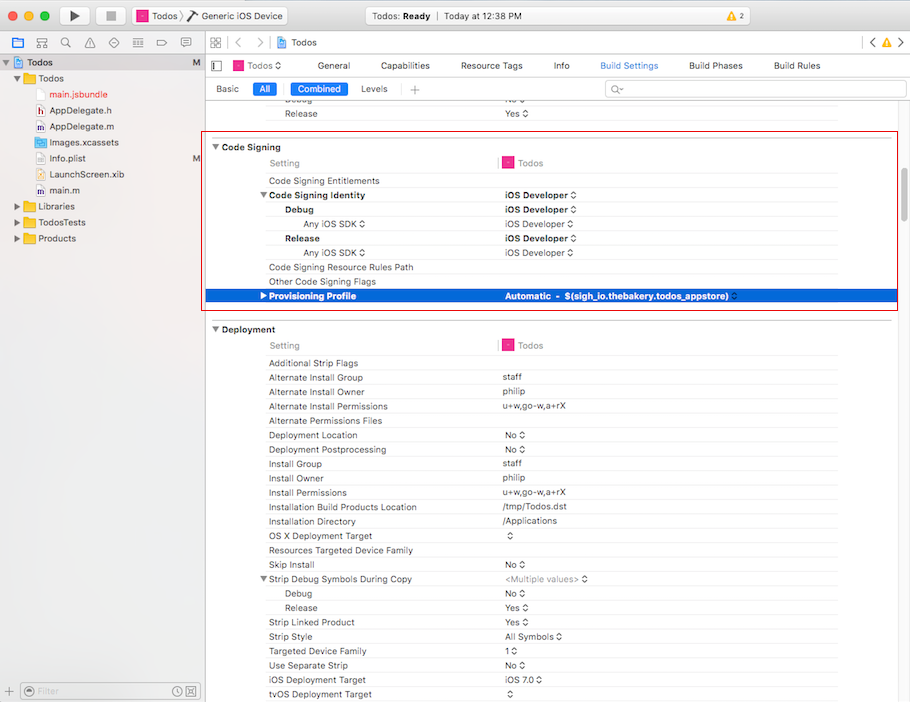
Next stop - Build Settings. Scroll down to Code Signing and Select “iOS Developer” option for Code Signing Identity field. For the Provisioning profile field select “Other” option and enter the following inside the text field that pops up
$(sigh_<YOUR-APP-BUNLDE>_appstore)
Once again, in our case this looks like this: $(sigh_io.thebakery.todos_appstore). This effectively instructs Xcode to use env variables set up by fastlane when signing binaries. The appstore suffix refers to Fastlane type used above in the Fastfile. Your build settings screen should look smth like this:
Trying fastlane beta locally
You can now give fastlane a try locally by running fastlane beta. If all goes well, your app binary will make it to iTunes Connect and you can send your shiny new build to your internal testers (make sure you add at least 1 internal tester in the Internal Testing section).
Automating deployments with Bitrise
I’d like to start with a quick note on Bitrise VS Circle VS Your favorite CI/CD system. I have not had a chance to try every single CI system out there (most of our open source projects use Travis). I found Bitrise to be very intuitive and focused on mobile with tons of useful premade building blocks.
Before we begin
We are gonna need a few pieces of information to configure Bitrise through env variables:
- email address you use to log in to Dev Portal/iTunes Connect (Apple ID)
- password for Dev Portal/iTunes Connect (Apple ID password)
- password you’ve used to encrypt certs and profiles with fastlane match
- user name for your GH Machine User
- email address for your GH Machine User
- private key for your GH Machine User
Creating a new App instance with Bitrise
Head to Bitrise Dashboard and click on “Add New App” to create an app and select your app’s repository.
Bitrise will ask you if you need to access additional private repositories, click on “I need to” and then select “Add own SSH” option and paste your Machine User private key

You can now tell Bitrise to scan your project to figure out the best configuration for the project. Select “Fastlane” configuration and use “beta” option for “Fastlane lane” and click “Confirm”. Next click on “Register a Webhook for me!” and click “Finish” on top of the screen.
Workflow
Head to Workflow screen for the newly created app instance and click on “Manage Workflows”
Click bitrise.yml menu item at the bottom of the left menu - we are gonna replace automatically generated workflow with something slightly more advanced (make sure you update GITHUB_USER_NAME and GITHUB_USER_EMAIL env vars):
Here’s a quick breakdown of the workflow sequence above:
- activate private SSH key for the Machine User
- configure git user information so github recognizes our friendly bot
- clone application repository
- check the latest commit to see if we should skip CI altogether (when using “[skip ci]” annotation)
- install React Native CLI
- install application dependencies
- launch fastlane
- push updated application artifacts back to Github (new build number)
Note: As of the time of this writing, Bitrise did not have built in support for skipping CI build based on commit message so I had to come up with a somewhat cludgy way of doing it. The reason we need skip functionality in the first place, is to prevent circular endless builds since we do push code back to GH.
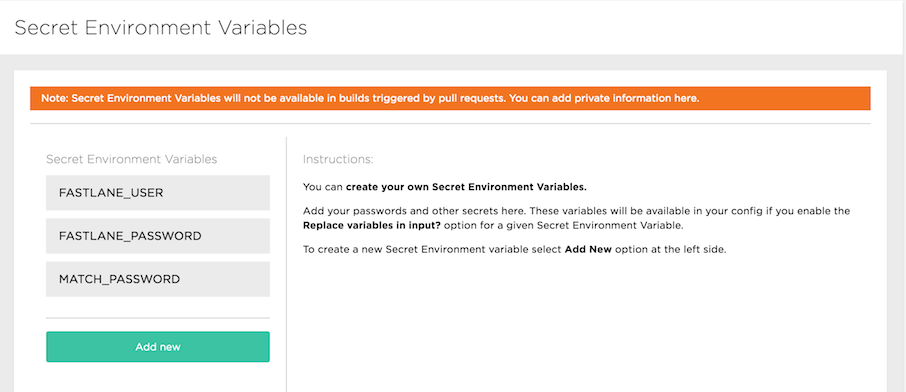
Head to “Secret Env Vars” and add the following variables:
- FASTLANE_USER <- Apple ID (email address used for Dev Portal/iTunes Connect)
- FASTLANE_PASSWORD <- password for the above account
- MATCH_PASSWORD <- password used to encrypt certs and profiles used in Fastlane
Your Secret Env Vars should look smth like this
Done
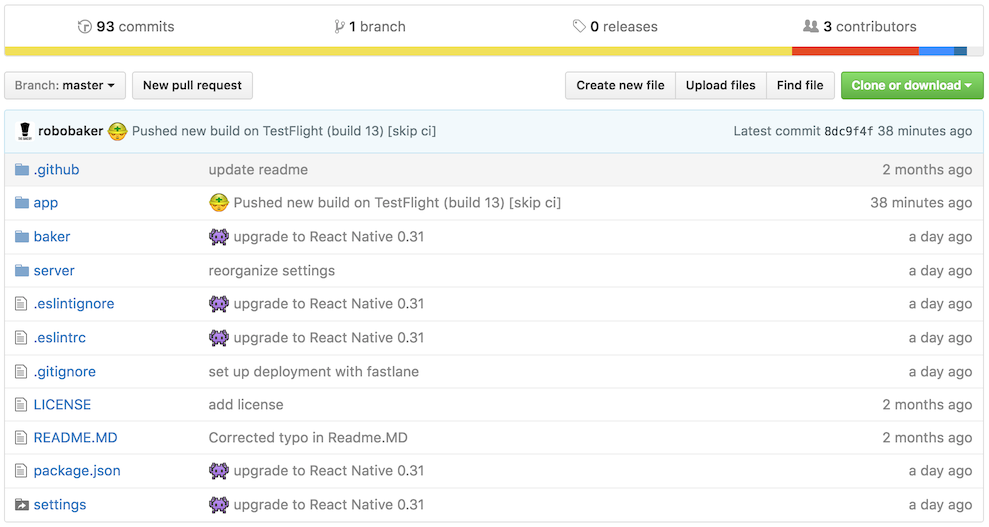
You can save your workflow and launch a new build. If all goes well, you should get a notification about a new build available on your Testflight and a friendly commit from your bot keeping track of app builds
Conclusion
Setting up CI stuff is tedious. I hope this guide will help some of you hit fewer walls along the way than I have. This being said, it’s worth it! Being able to automate a lot of these menial tasks to free up more time for creative stuff feels great. This CI script will be also part of Baker - an open source boilerplate making developing React Native apps less tedious and more fun.
Resources
- Fastlane
- Managing Deploy keys
- Bitrise Dev Center
- How to automate Android build process on Bitrise CI by Hesam
- Deploying a React Native App with Fastlane - Part 1 and Part 1a by Daniel Banck
- Continuous Integration in Snowflake boilerplate
